
Home / Engineering Note / How to Install a Detachable Container House: Step-by-Step Guide for Fast On-Site Assembly

How to Install a Detachable Container House: Step-by-Step Guide for Fast On-Site Assembly

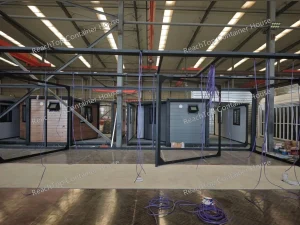
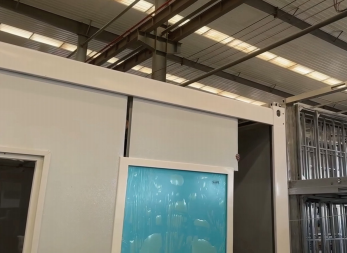
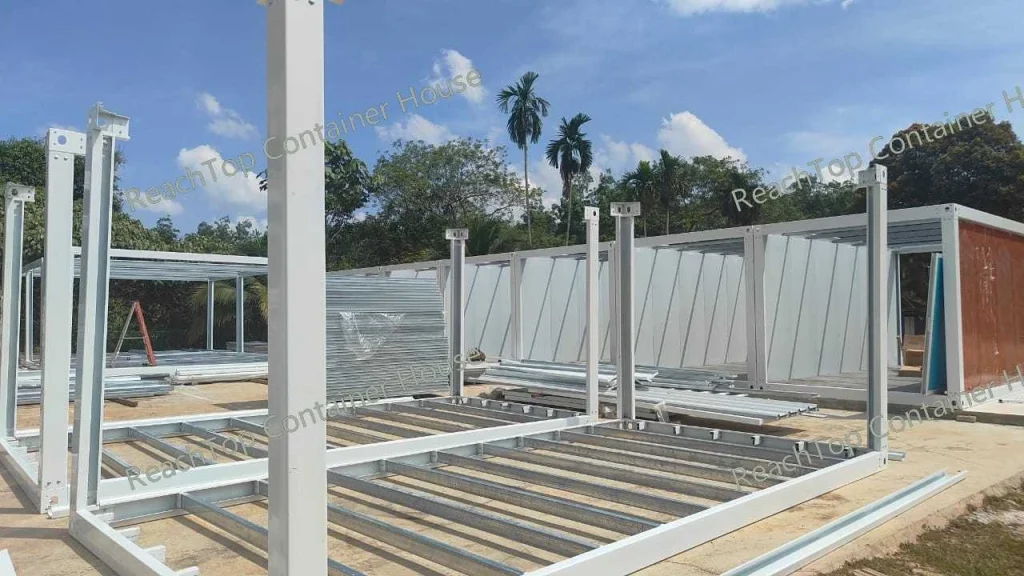
Close-up of galvanized steel frame skeleton for modular camp container units, metal beams and wall panels stacked on concrete foundation, tropical palm trees background
Installing a detachable container house is a straightforward process when the structure is properly designed and pre-engineered at the factory. Compared with traditional construction, detachable container houses significantly reduce on-site labor, installation time, and overall project risk.
In this article, we will explain how a detachable container house is installed on site, from foundation preparation to final inspection. Whether you are a contractor, developer, or project owner, this guide will help you understand the installation workflow and plan your project more efficiently.

Site requirements:

The site surface must be leveled. Foundation installation drawings are included with the goods; please arrange the site according to the foundation drawings.

Inspection work:

Carefully inspect each part, checking for any damage to the components. Also, check the inventory against the delivery note to ensure all materials and accessories are complete.

Tools needed:

Allen wrenches, pry bars, electric drills, pliers, Phillips screwdrivers, glue guns, cutting machines, levels, etc.
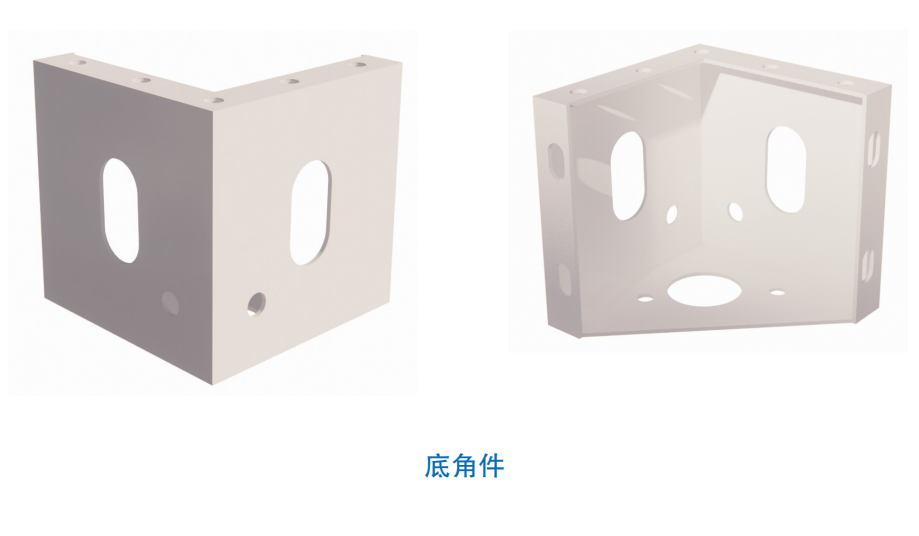
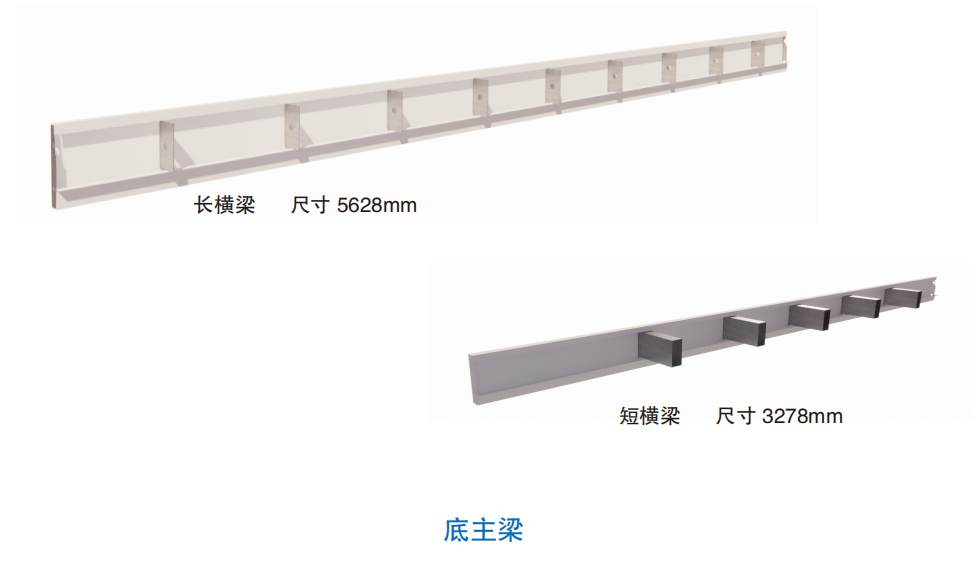
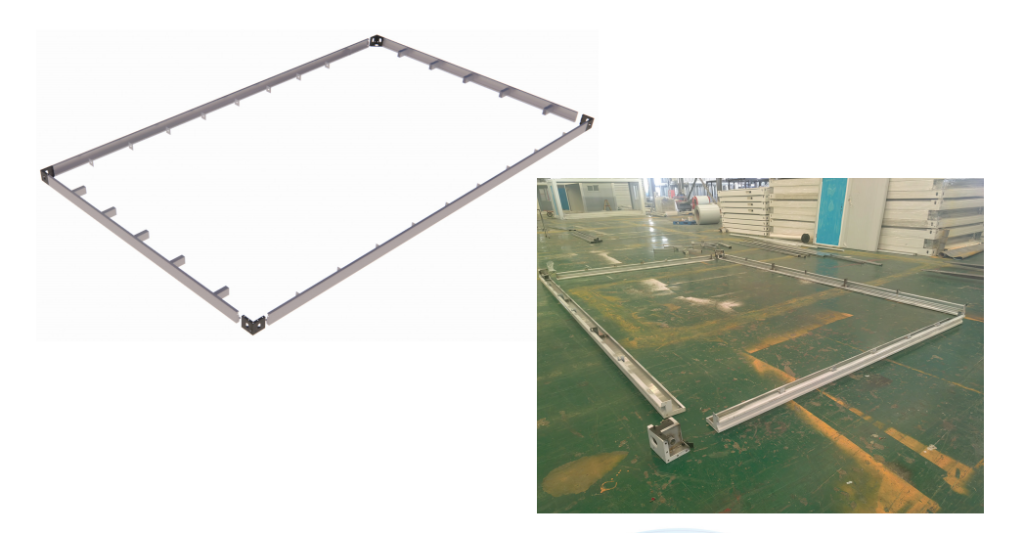
1. First, place the bottom main beams (2 long and 2 short) and corner pieces as shown in the figure below.
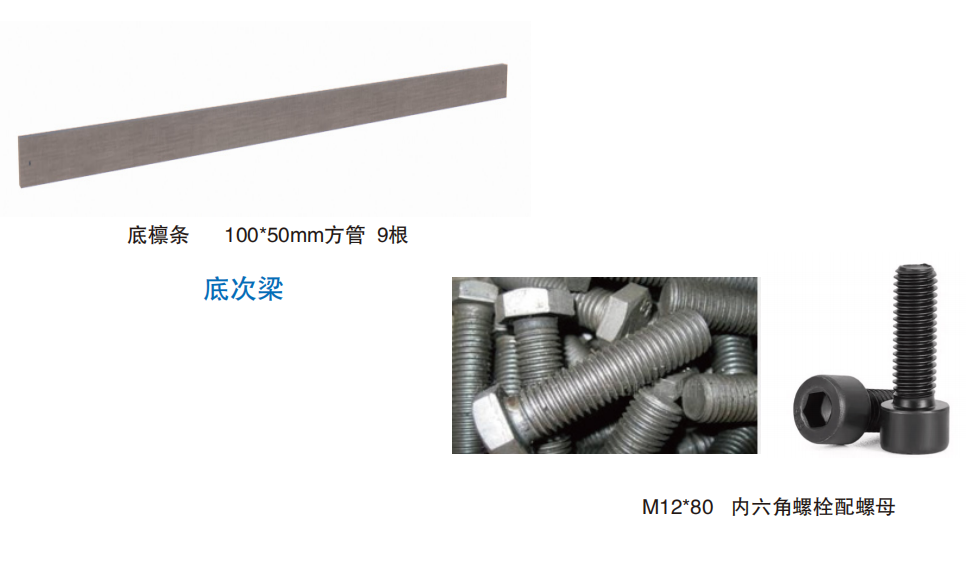
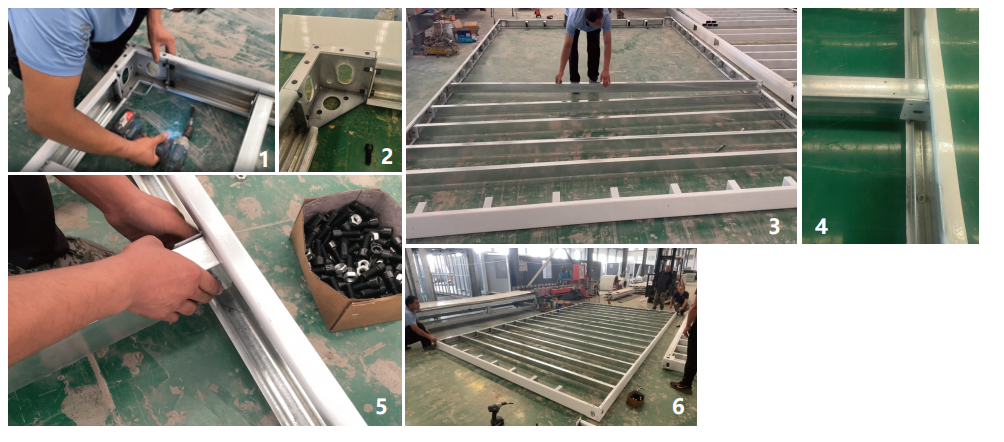
2. Connect the corner pieces and main beam using M12*30 hex bolts. Then place the purlins. The spacing between the purlins and the fixing plates needs to be measured and pre-drilled. When placing the purlins, ensure they are angled into the frame and secured to the front and back positions of the two side support plates; then secure them with M12*80 hex bolts.
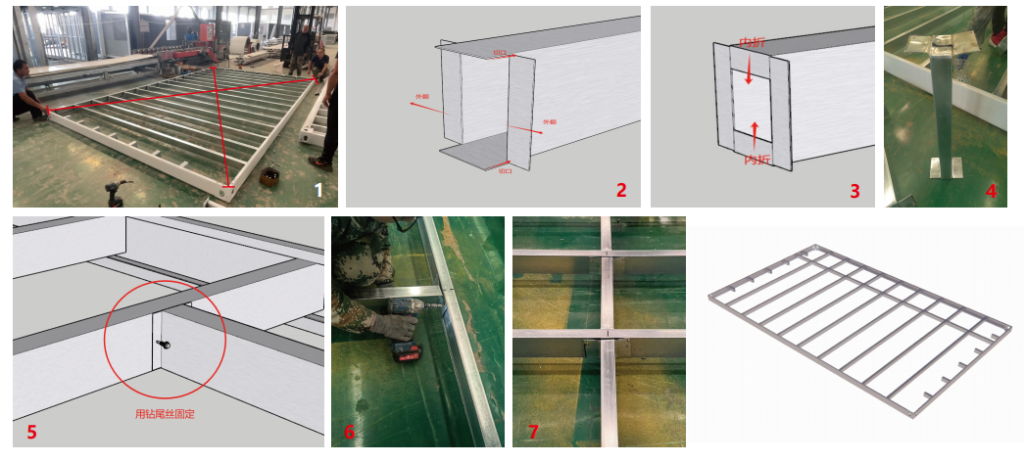
3. After the purlins are installed, measure whether the diagonals of the frame are consistent;
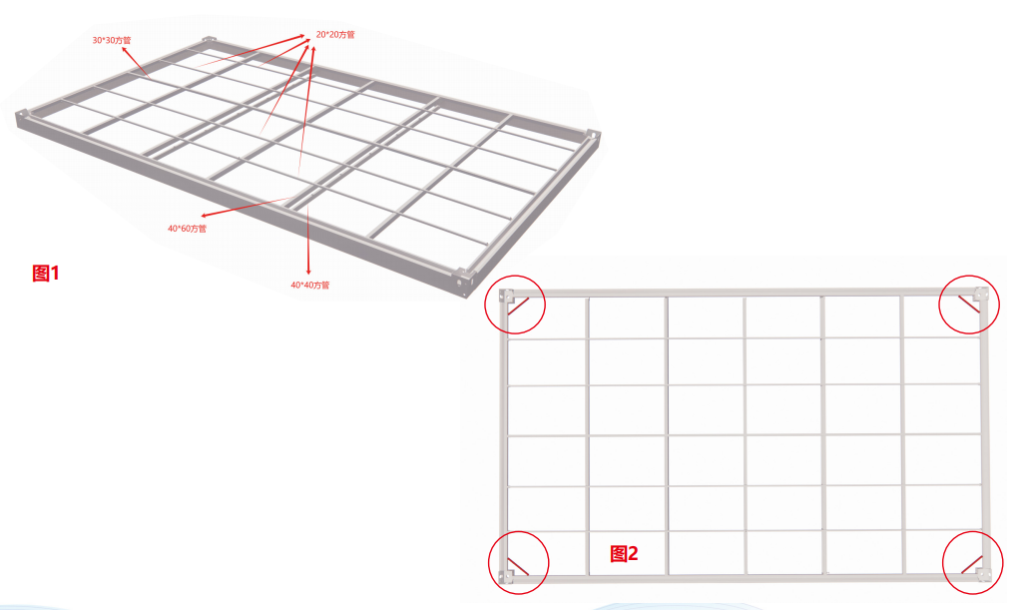
4. The method for cutting and installing longitudinal short purlins is shown in Figures 2, 3, 4, 5, 6, and 7.
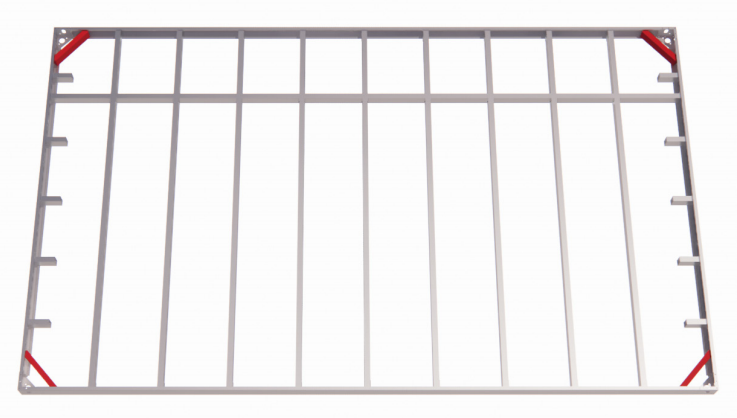
5. Diagonal braces are placed at the four corners, which can be welded or directly fixed to the cement board with screws.
Special note:
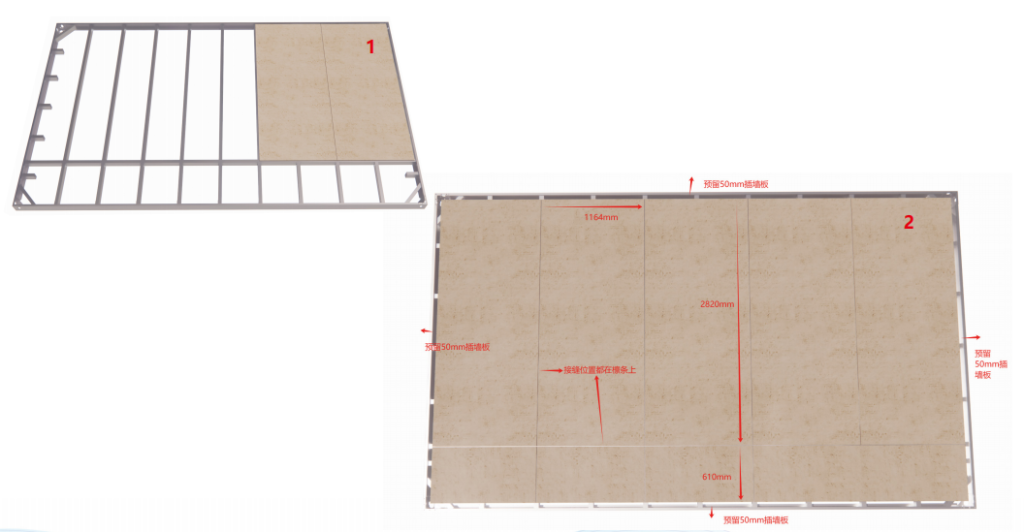
The joints of the cement board are all on the purlins (as shown in Figure 1); a 50mm wall panel space is reserved around the perimeter (as shown in Figure 2).
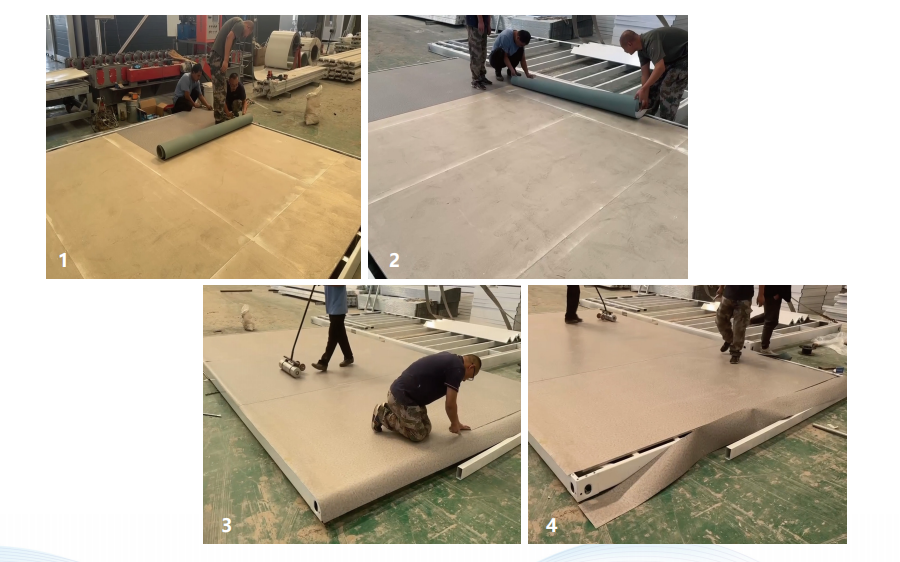
6. Use a scraper to evenly spread the adhesive on the cement board, and let it dry until it is slightly sticky to the touch.
7. Lay the plastic flooring (three pieces horizontally joined seamlessly), compact it with rollers, and trim the edges.
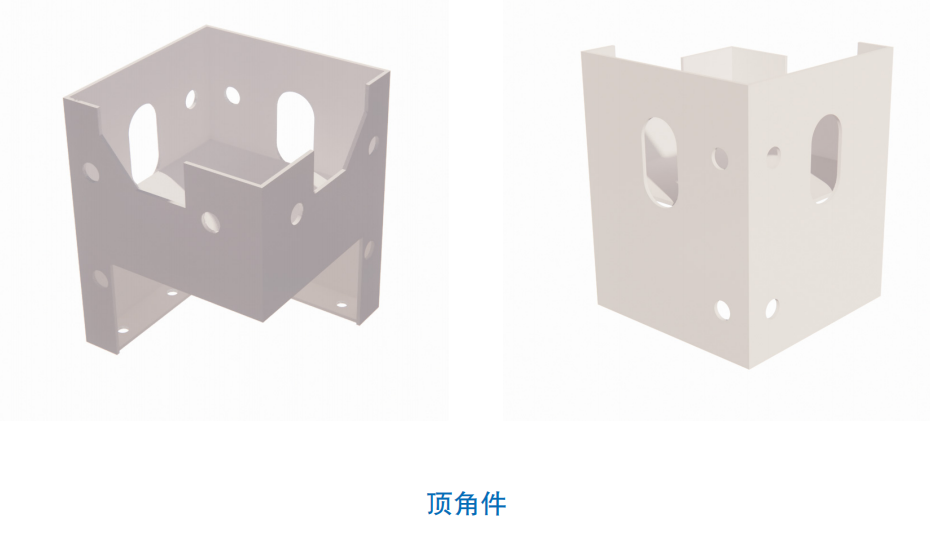
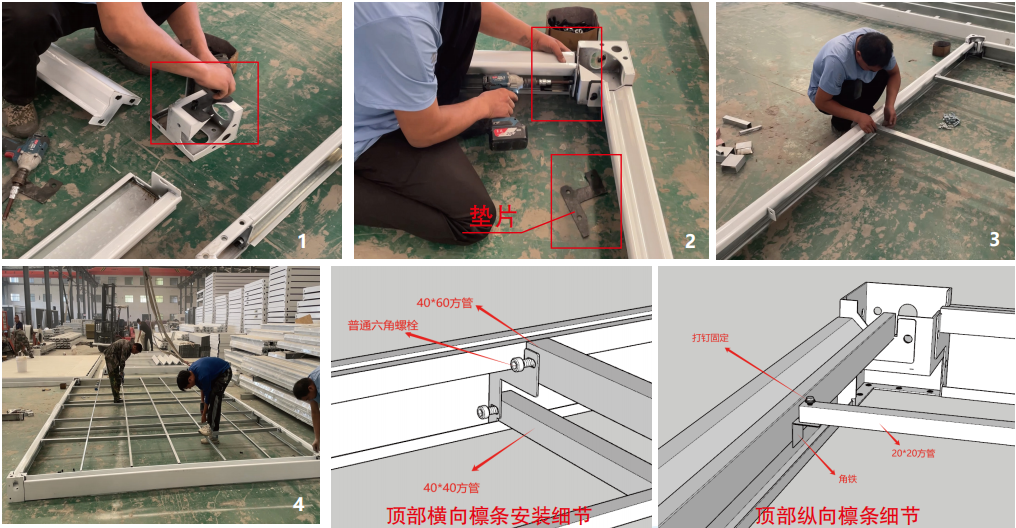
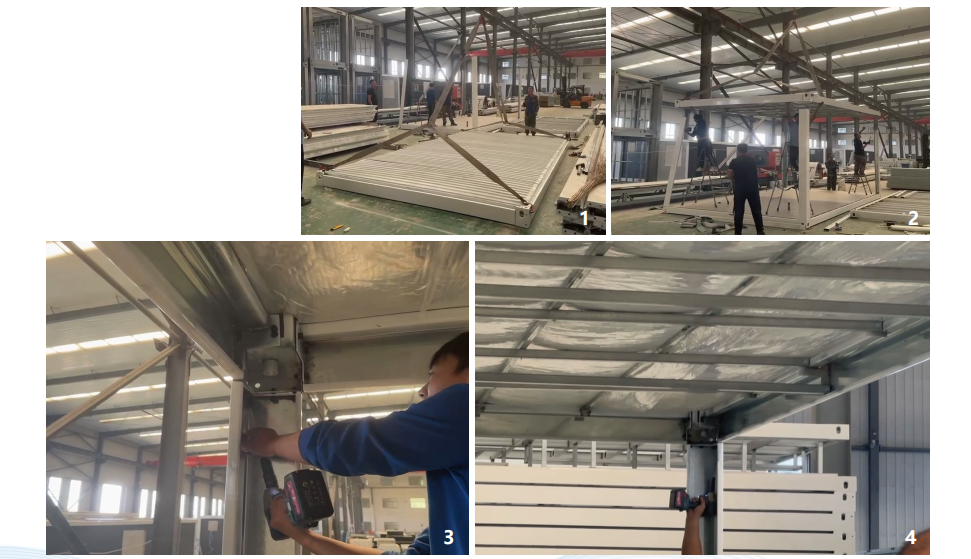
8. Install the gaskets onto the corner brackets (Figure 1). Connect the corner brackets to the top main beam with bolts (Figure 2).
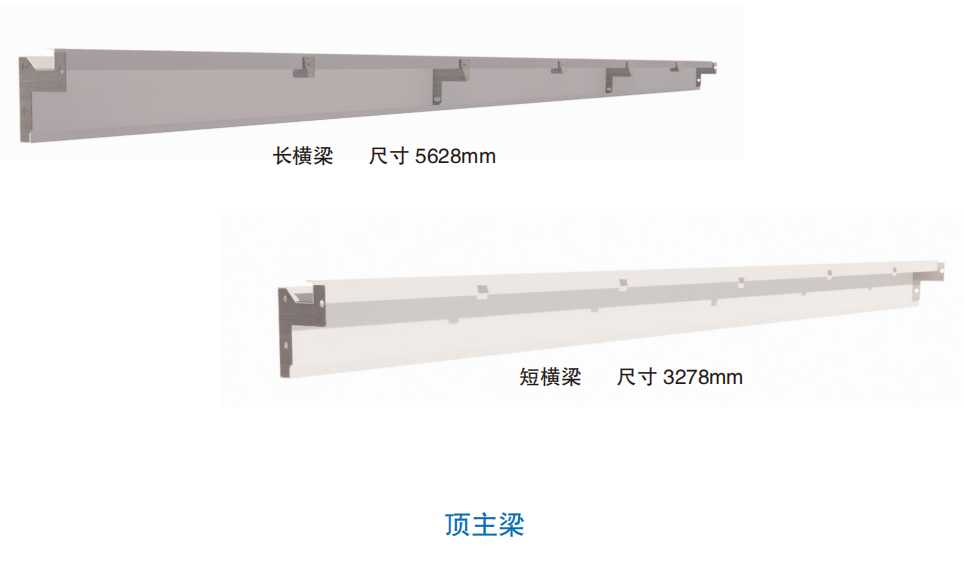
9. Install the top purlin (12*80 hex bolts) (Figure 3, Figure 4).

Schematic diagram of the top frame purlins (Figure 1). Add diagonal bracing (20*20 square tubing) (Figure 2).

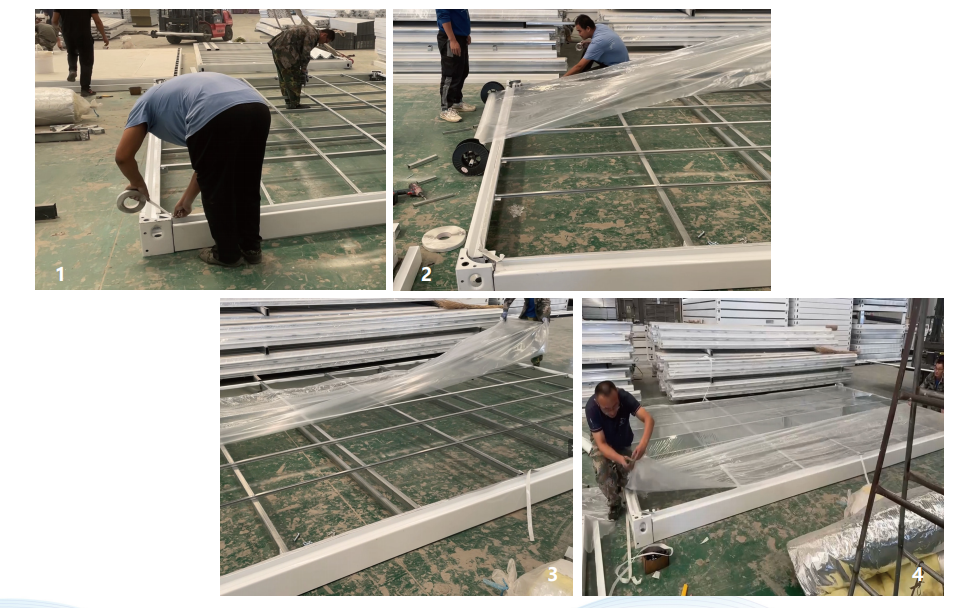
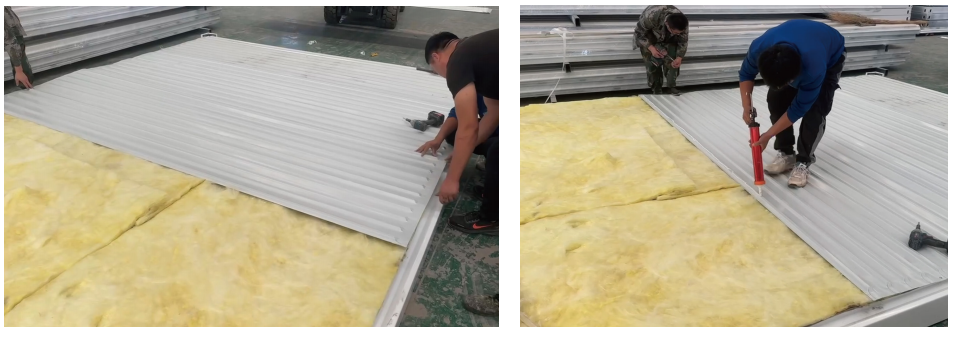
10. First, apply double-sided tape to the top of the frame, then lay the moisture-proof membrane longitudinally.
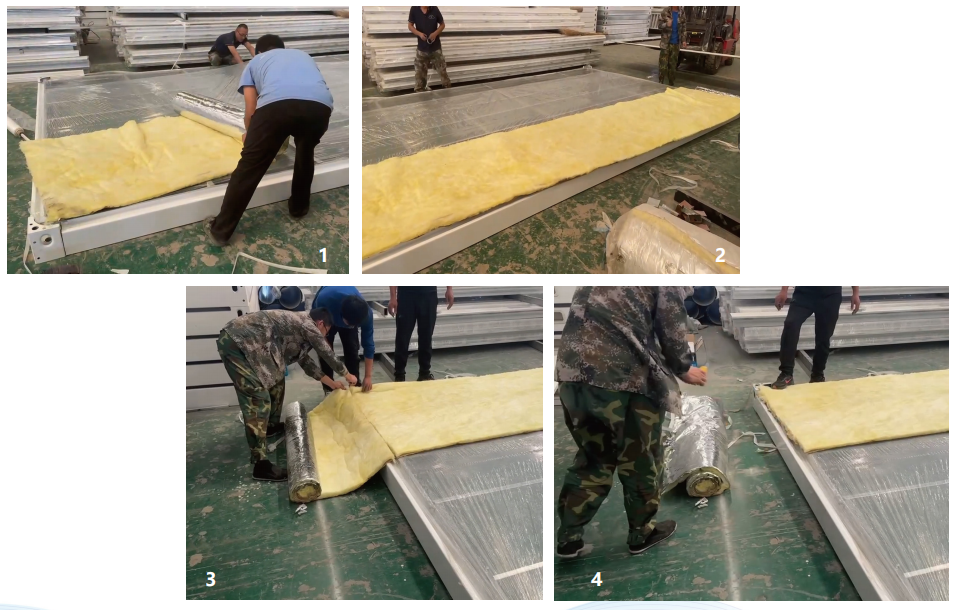
11. Lay three layers of insulation cotton longitudinally.
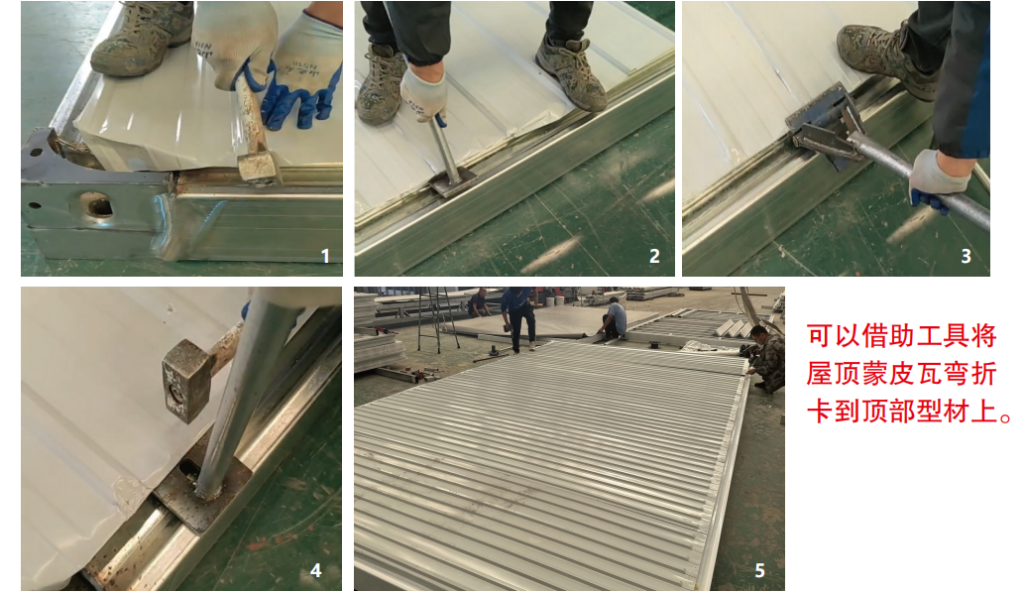
12. Lay the skin horizontally, with the edges of the skin folded inward toward the top profile, and fix the overlapping parts of adjacent skins with glue.
Special note: Avoid screwing in roof tiles unless absolutely necessary to minimize the risk of leaks.
Tools can be used to bend the roof shingles and clip them onto the top profile.
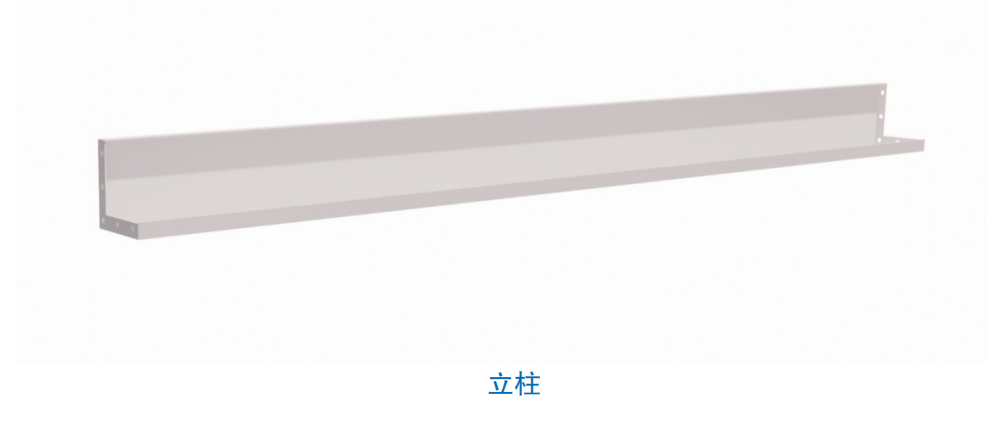
Detachable container house pillars

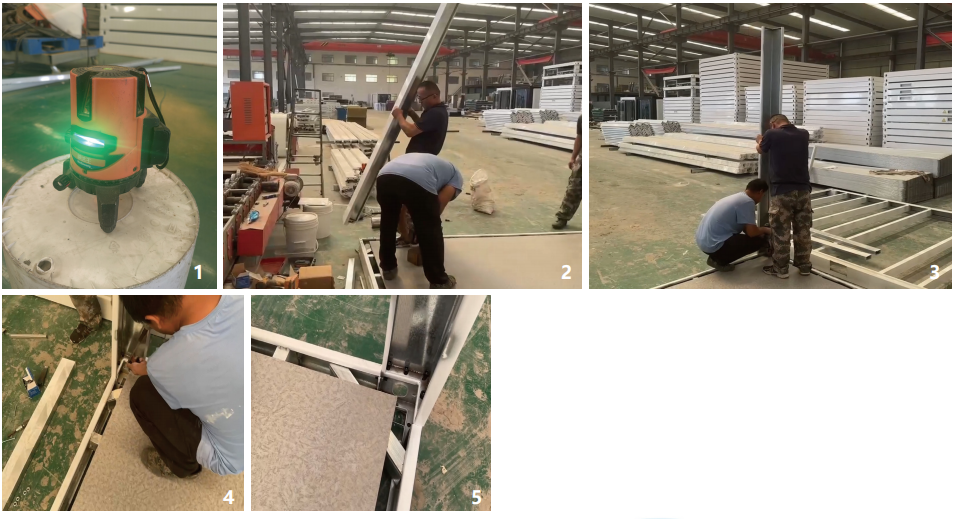
13. Use a level to level the bottom frame, then fix the uprights and bottom corner pieces to the frame with bolts, and install the four uprights in sequence.

14. Assemble the top frame. Hang the top frame directly above the column and fix the top frame to the column one by one with bolts.
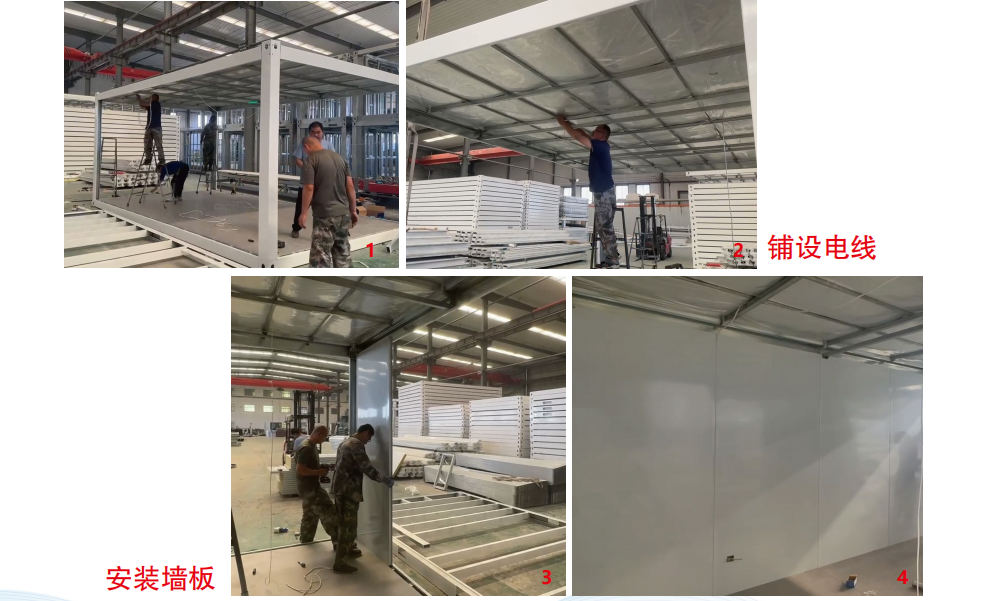
15. Lay the electrical circuit between the purlins and the moisture barrier, and then install the wall panel (the bottom is clipped into the groove).
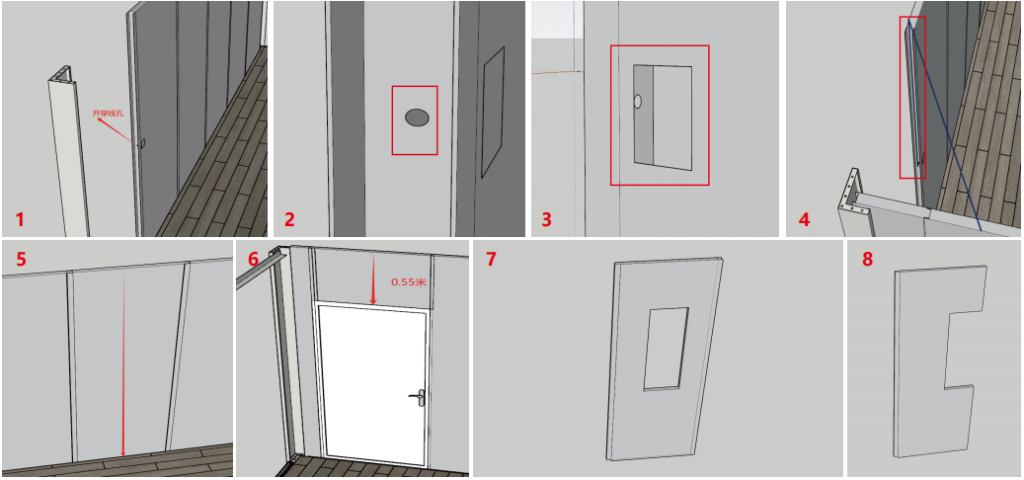
16. Reserve wiring holes on the side of the wall panel (Figures 1 and 2), and reserve installation holes for switches and sockets on the front (Figure 3). The wiring on the facade runs through the gaps between the wall panels and enters the wiring holes (Figure 4).
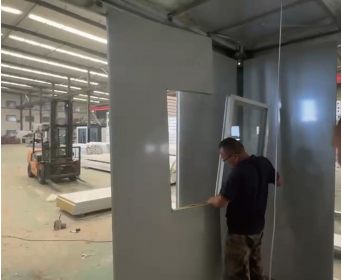
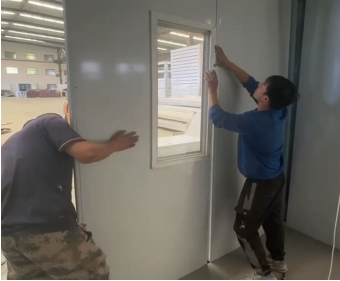
The wall panel height is 2.5 meters (Figure 5), the wall panel height above the door is 0.55 meters (4 wall panels can be made from a 2.2-meter long panel, and 3 wall panels can be made from a 1.65-meter long panel) (Figure 6), and the wall panel for installing windows is made by cutting holes in a 2.5-meter long panel (Figures 7 and 8).

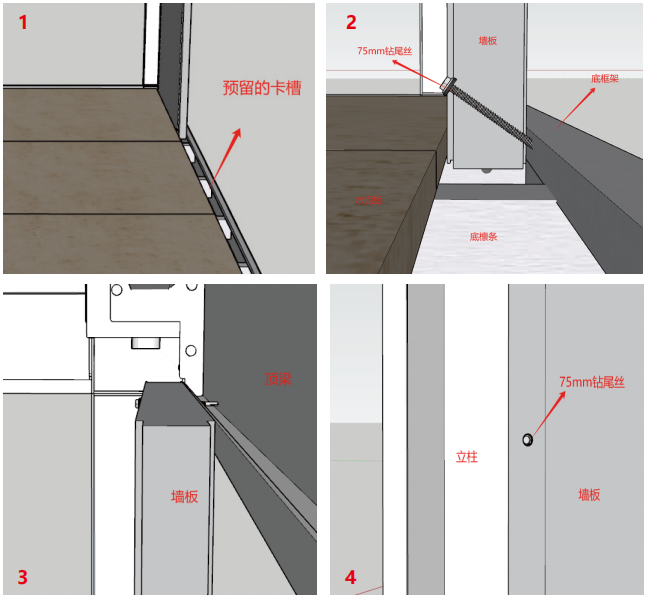
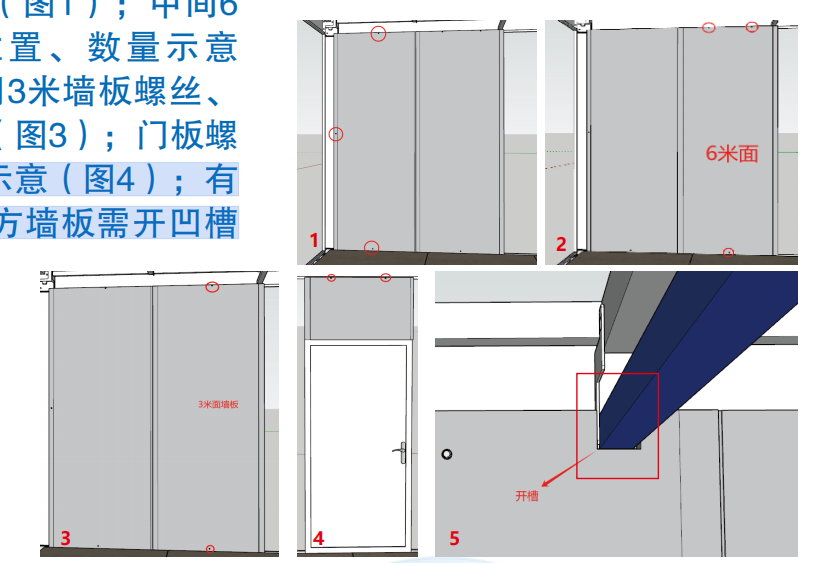
17. When installing the wall panel, insert the bottom of the wall panel into the slot reserved in the bottom frame (Figure 1). At the center of the bottom of the wall panel, drill a 75mm self-drilling screw at an angle to the bottom beam to fix the wall panel (Figure 2). Fix the top of the wall panel to the top frame with a self-drilling screw (Figure 3). Drill a self-drilling screw on the side of the wall panel near the column to fix the wall panel to the column (Figure 4).

Figure 1 shows the location and quantity of wall panel fixing screws near the columns; Figure 2 shows the location and quantity of screws on the middle 6-meter wall panel; Figure 3 shows the location and quantity of screws on the middle 3-meter wall panel; Figure 4 shows the location and quantity of door panel screws; Recesses need to be cut into wall panels where purlins obstruct the view (Figure 5).

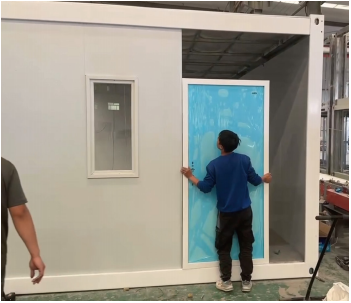
18. Install windows.

19. Install the door.

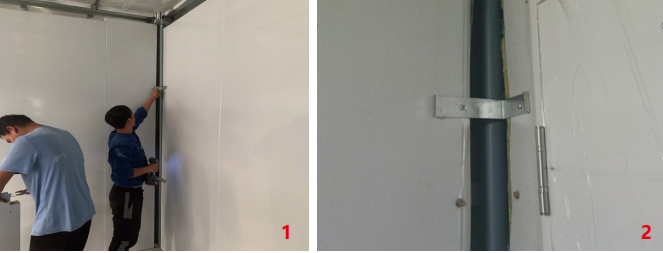
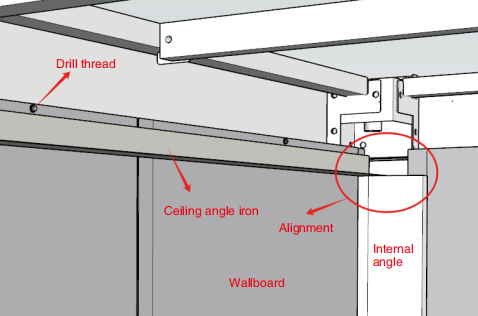
20. Install the inside corner clips and install the inside corner.
Special note: The length of the inside corner must be matched with the height of the ceiling angle iron (installation step 23).
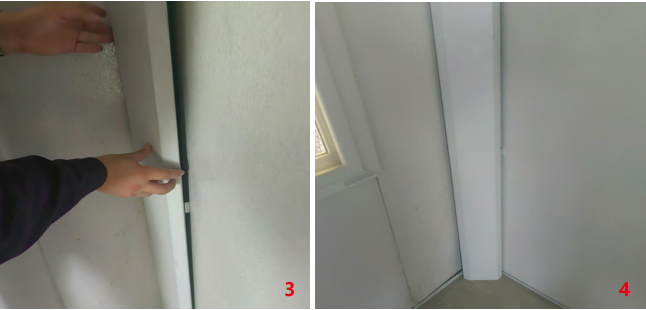
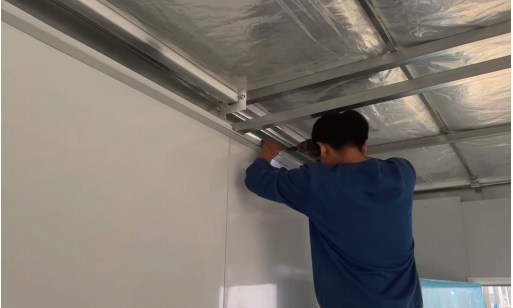
21. Install ceiling angle iron.

Special note: Avoid wall panel screws during installation, and fit snugly against the top of the inside corner.

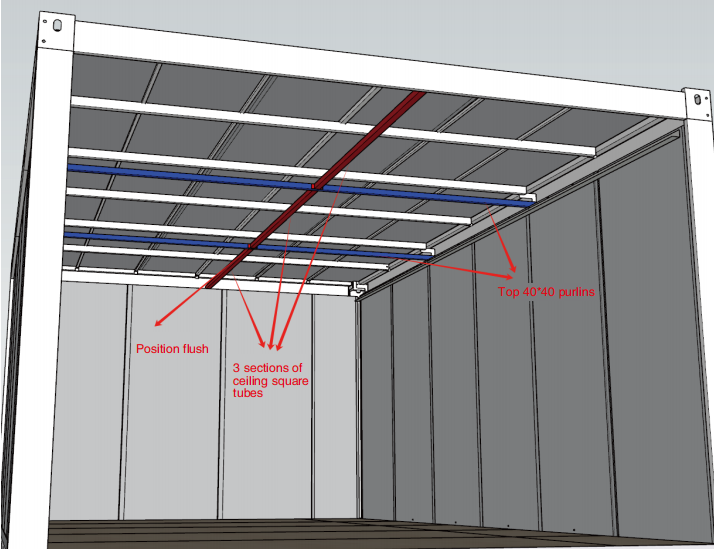
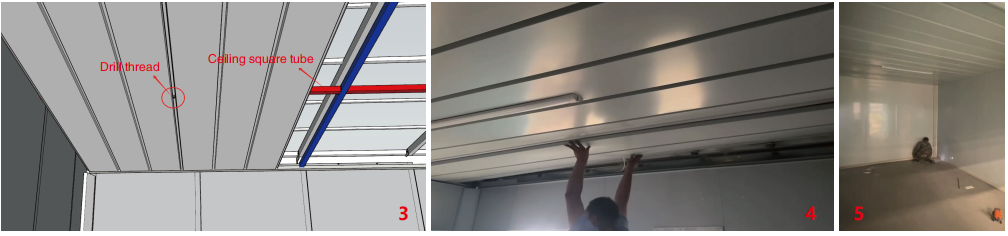
22. Install ceiling square tubes longitudinally at the top.
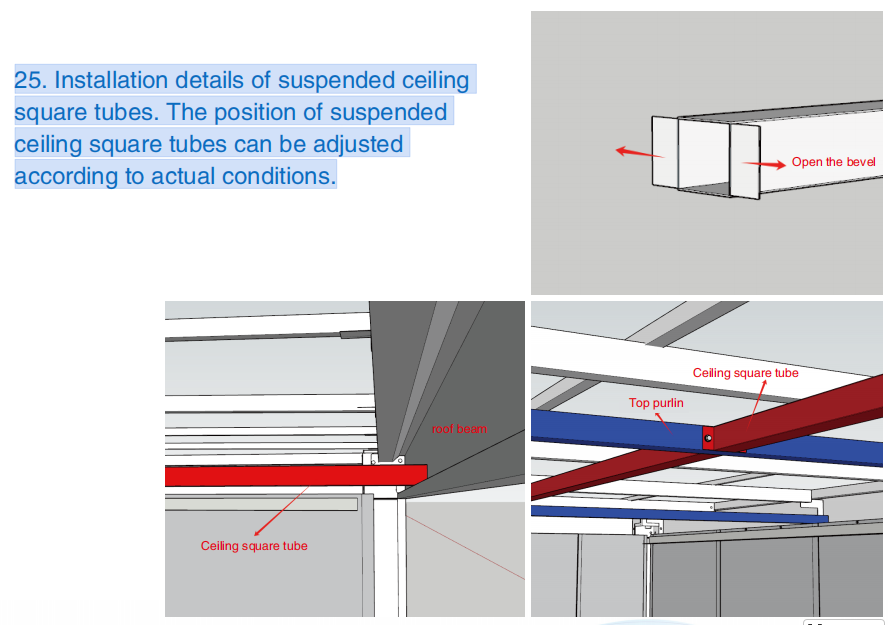
23. Installation details of suspended ceiling square tubes. The position of suspended ceiling square tubes can be adjusted according to actual conditions.
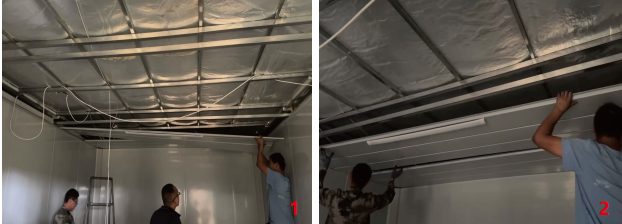
24. Install the ceiling tiles and lamps in sequence and the installation is complete.
Special attention: reserve wire holes where there are lights, fix them with screws in the grooves at the connection, and use drill bits to fix the two ceiling tiles to the square tube of the ceiling.
A detachable container house is designed to simplify on-site construction while maintaining structural strength, durability, and flexibility. With proper foundation preparation and a clear installation sequence, the entire process can be completed quickly and safely by a small installation team.
If you are planning a project or need detailed installation drawings, loading plans, or technical support, working directly with an experienced container house manufacturer can help ensure a smooth installation and long-term performance of the building.
Tell Us Your Project

Tell us your requirements — we’ll help you define the layout, optimize container loading, and provide a clear project quotation.