
Installing an expandable container house is straightforward and surprisingly satisfying. A folded transport unit becomes a complete building through a short and repeatable sequence, and the standard installation does not require a specialist team.
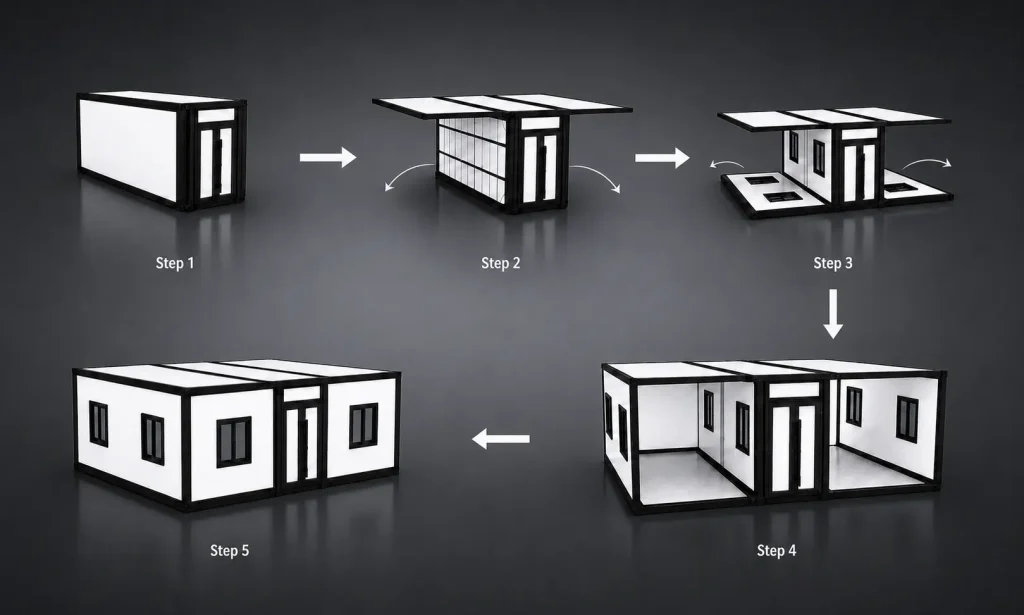
Prepare several physically capable adults, normally a crew of four, together with suitable lifting equipment. The complete process has five main stages: position the folded house, open the two roof sections, lower the side floors, open and secure the wall panels, and complete the sealing and interior trims.
The house installation follows the same basic sequence from one unit to the next. Foundation construction does not, because ground level, soil, drainage and project use change from site to site. This article therefore focuses on installing the expandable house itself.
Foundation planning, an additional roof, solar panels and other project-specific work should be arranged separately. Contact Sales@ReachTopHouse.com if these items are included in your project.
Important Safety Notice :
Installing an expandable container house is straightforward, but the moving roof, floor and wall sections are large and heavy. The main risk points are identified in the installation steps below, especially when the side roof sections are raised and temporarily supported.
Keep everyone away from suspended or moving panels, maintain control of every temporary support and watch for pinch points around hinges and panel edges. Wear gloves, safety footwear and head protection throughout the work. The same level of care should be maintained during parts of the installation that are not specifically described in this short guide.
Expandable Container House Installation at a Glance
| Step | Main Work | Key Check |
|---|---|---|
| 01 | Place the folded house on the prepared foundation. | Confirm orientation, support points and base-frame level. |
| 02 | Raise both side roof sections and position the temporary supports. | Keep every support under control and no one beneath the roof. |
| 03 | Release the safety pins and lower the two side floors. | Control the movement and align both floors with the centre section. |
| 04 | Install the sealing strips, open the wall panels and fit the bolts. | Align the walls before tightening the connections. |
| 05 | Complete the roof waterproofing and install the interior trims. | Check joints, bolts, doors, windows and floor alignment. |
Tools Required for Installation
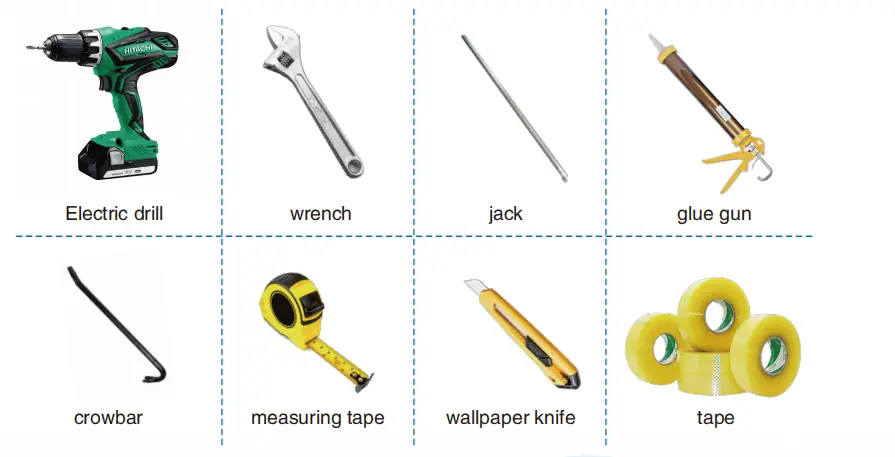
Prepare an electric drill with suitable bits, wrenches, jacks, a sealant gun, crowbar, tape measure, utility knife and the required sealing tapes and installation materials.
Check the tools and installation accessories before the house is unfolded. Missing sealing strips, bolts or fixing components are much easier to identify while the unit is still closed.
Step 1: Place the Folded House on the Prepared Foundation
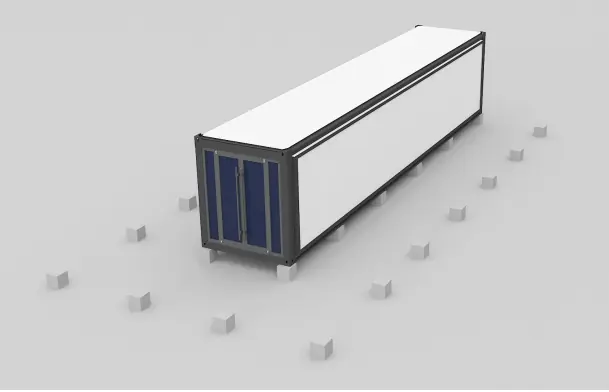
Use a crane or other suitable lifting equipment to place the folded expandable container house onto the prepared foundation.
Confirm the orientation and final position before unfolding the house. Check that the main support points are correctly positioned and that the base frame is level. An uneven base affects the alignment of the floors, walls, doors and windows after the house is opened.
Step 2: Open and Support the Side Roof Sections
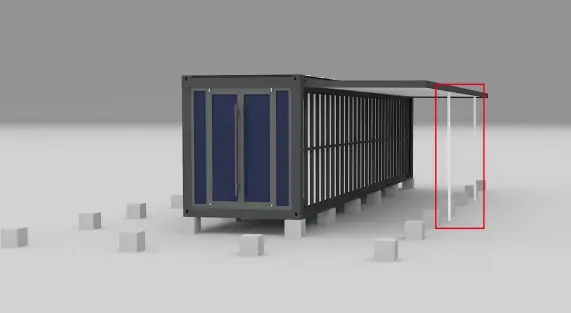
Raise the two side roof sections and immediately position the supplied support legs beneath them. At least one worker should remain with each support leg and keep it stable while the rest of the crew continues the installation.
Some buyers use an excavator or other available construction or agricultural machinery to support the raised roof section. It can look excessive for a simple installation, but when suitable equipment is already available on site, it gives the crew firmer control and makes this stage safer.
This is the highest-risk stage of the installation. No one should stand beneath the raised roof or enter its possible fall path.
Step 3: Lower the Side Floor Sections
After the roof sections are stable, release the safety pins and lower the two side floor sections.
Keep hands and feet away from the hinges and outer edges while the floors are moving. Lower each section under control until it sits flat and aligns with the central floor structure.
Step 4: Open and Secure the Wall Panels
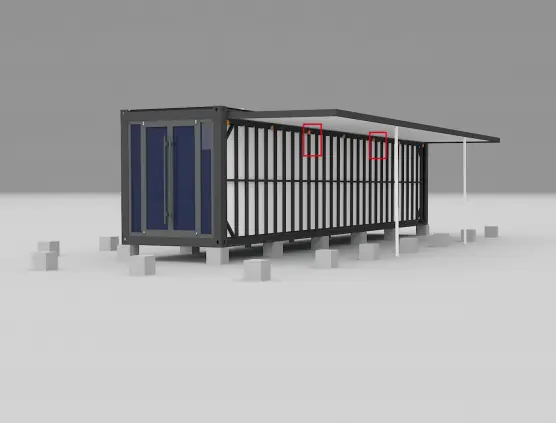
Install the required rubber sealing strips at the wall connections before moving the wall panels into position.
Open the wall panels, align them with the roof and floor structure, and install the fixing bolts. Complete the alignment first and then tighten the connections.
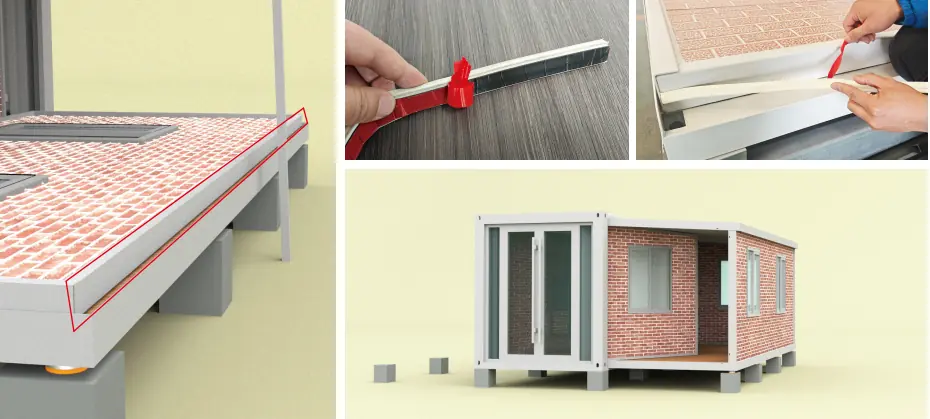
Step 5: Complete the Waterproofing and Interior Trims
Apply the required waterproofing treatment to the upper folding joints and remaining exterior gaps. Depending on the purchased model, this includes rubber sealing strips, waterproof tape and sealant at the specified locations.
Inside the house, install the folded trims and other closing pieces around the unfolded joints. Finish by checking the bolts, wall connections, roof joints, floor alignment, doors and windows before connecting the utilities.
For a detailed explanation of the main waterproofing positions, read Why Do Some Expandable Container Houses Leak?. For long-term outdoor use, also see Does an Expandable Container House Need an Additional Roof?
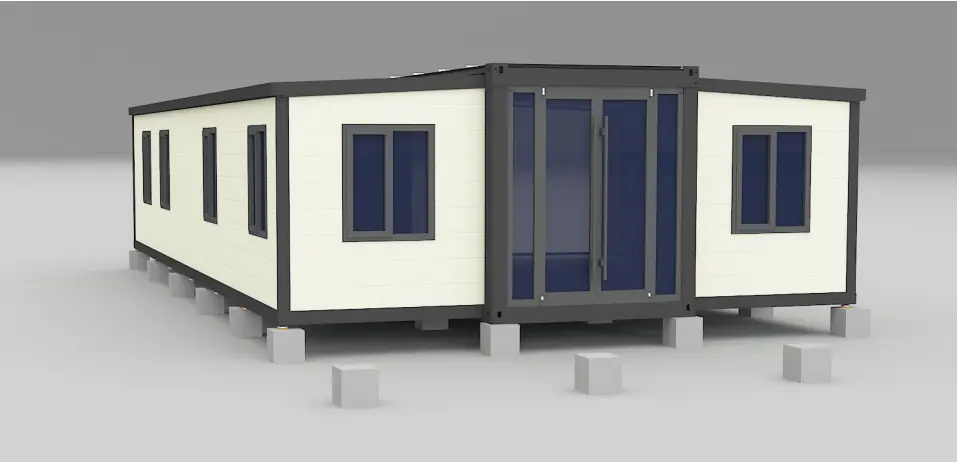
Installation Support for Your ReachTop Model
These five steps cover the standard installation sequence. The exact support arrangement, waterproofing procedure, installation safety details and interior closing pieces are matched to the ReachTop model purchased.
ReachTop does not publish every model-specific structural and installation detail openly. After the order is confirmed and the deposit is received, the buyer receives a complete installation manual for the purchased model together with direct support from our team.
For foundation preparation, an additional roof, solar installation or other site work, send your house model, site access conditions, lifting restrictions and delivery schedule to Sales@ReachTopHouse.com. We will prepare installation guidance for the actual project.